WOW resource page

The 3 extra holes closer to the center were me experimenting with the design. The leg holes closest to the edge provide more stability
Sometimes, even the best layed plans…
As a wood worker, one thing you should know is that it never turns out exactly as you’d planned. Wood is alive, it’s organic, each piece is unique. SO it should come as no surprise when challenges arise from thin air or so it seems. But, from adversity we find innovation and creativity. We face obstacles and devise new ways to overcome and achieve.
So, for me, and us, the major challenge we face today, is wood quality. The industrial forestry system has turned 2 x 4s in 1 x 3s, and seems to be trying to sell us wood that is either warped, wet, cracked or skip planed. So this project, while it will still be a milking stool, will be slightly different than the stool pictured, due to the simple fact that there was no decent lumber within a 100 mile radius.
but don’t have a cow!
Our milking stool will feature a colorful, laminated top, turned hidden tenons, and complimentary cross braces. It will be a challenge to laminate all those pieces but we can do it. We got this!
The coyote and Julia Child…
As I was plotting my next move last night I heard a coyote call out to it’s kin. I love coyotes for what they symbolize in many indigenous cultures. The coyote is a trickster, a destroyer but also a creator, a harbinger of innovation, whose presence invites us to imagine new pathways forward.
Julia Child, well, I think we all know her legacy. She was nearly 40 when she discovered her secret talent, french cuisine and her ability to inspire an entire world to approach adversity with cheer, gusto, humor and grace. I love especially the story of her dropping an entire roasted chicken on the floor, picking it back up, dusting it off and placing in lovingly back onto the serving platter for her guests to enjoy. Nothing to see here folks. Just a delicious beautiful bird. Don’t let your pride get in the way of enjoying the entire process, dropped birds and all. There is always something new to learn and enjoy. Thank you Coyote and Julia Child for being our spirit guides this workshop.
Revised schedule 7/27
10AM - 12:15
After a short introduction we will begin with a deep dive into spoon carving to begin to understand the characteristics of wood. Knife skills are life skills!
12:15 - 1PM Lunch break. The wood shop is closed. I will be on break (or preparing for part 2) so please get some sustenance and return promptly at 1PM.
1PM - 4 PM I will show the entire class how to use a miter saw to cross cut, rip wood on a tablesaw and laminate your top.
You will then work with me in smaller groups so I can help you achieve our goal of laminating our top today.
If you are not working with me in the wood shop, you are carving your spoon and spoon experiments.
Clean up starts at 3:45. Class ends at 4PM.
Schedule 7/28
10AM - 12:15 I will demonstrate next steps, planing and cutting your top into a circle, laying out a equilateral triangle to locate leg wholes, and using a drill press to drill out your leg wholes. Then we will work in smaller groups to achieve our morning tasks.
12:15 - 1 PM Lunch break.
1 - 4 PM We will shape our legs and cross braces and assemble our milking stools with glue. While you are waiting to work with me you will be sanding your top, legs and cross braces and/or carving spoons.
I will conclude with a brief discussion of finishes and we will clean up. Class may go late Sunday so that everyone gets it done!
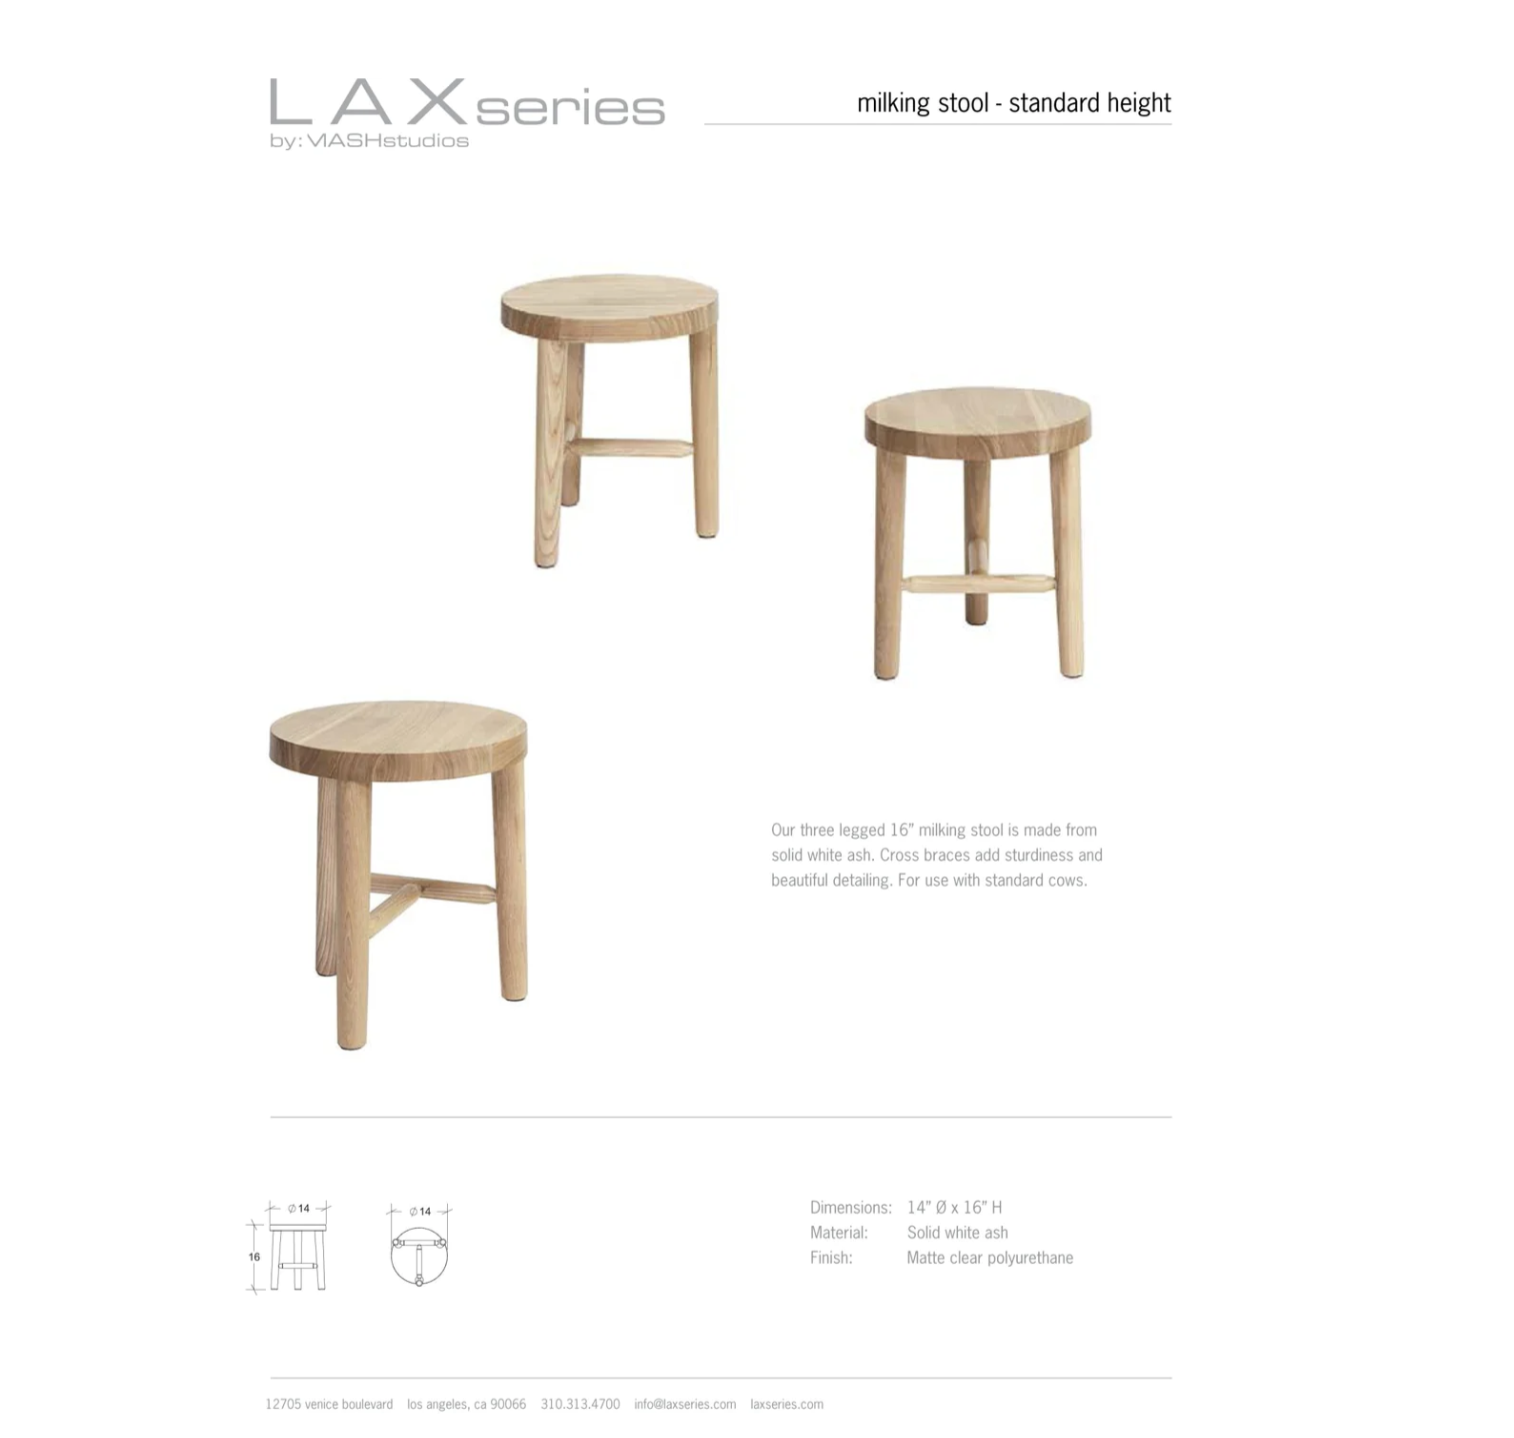
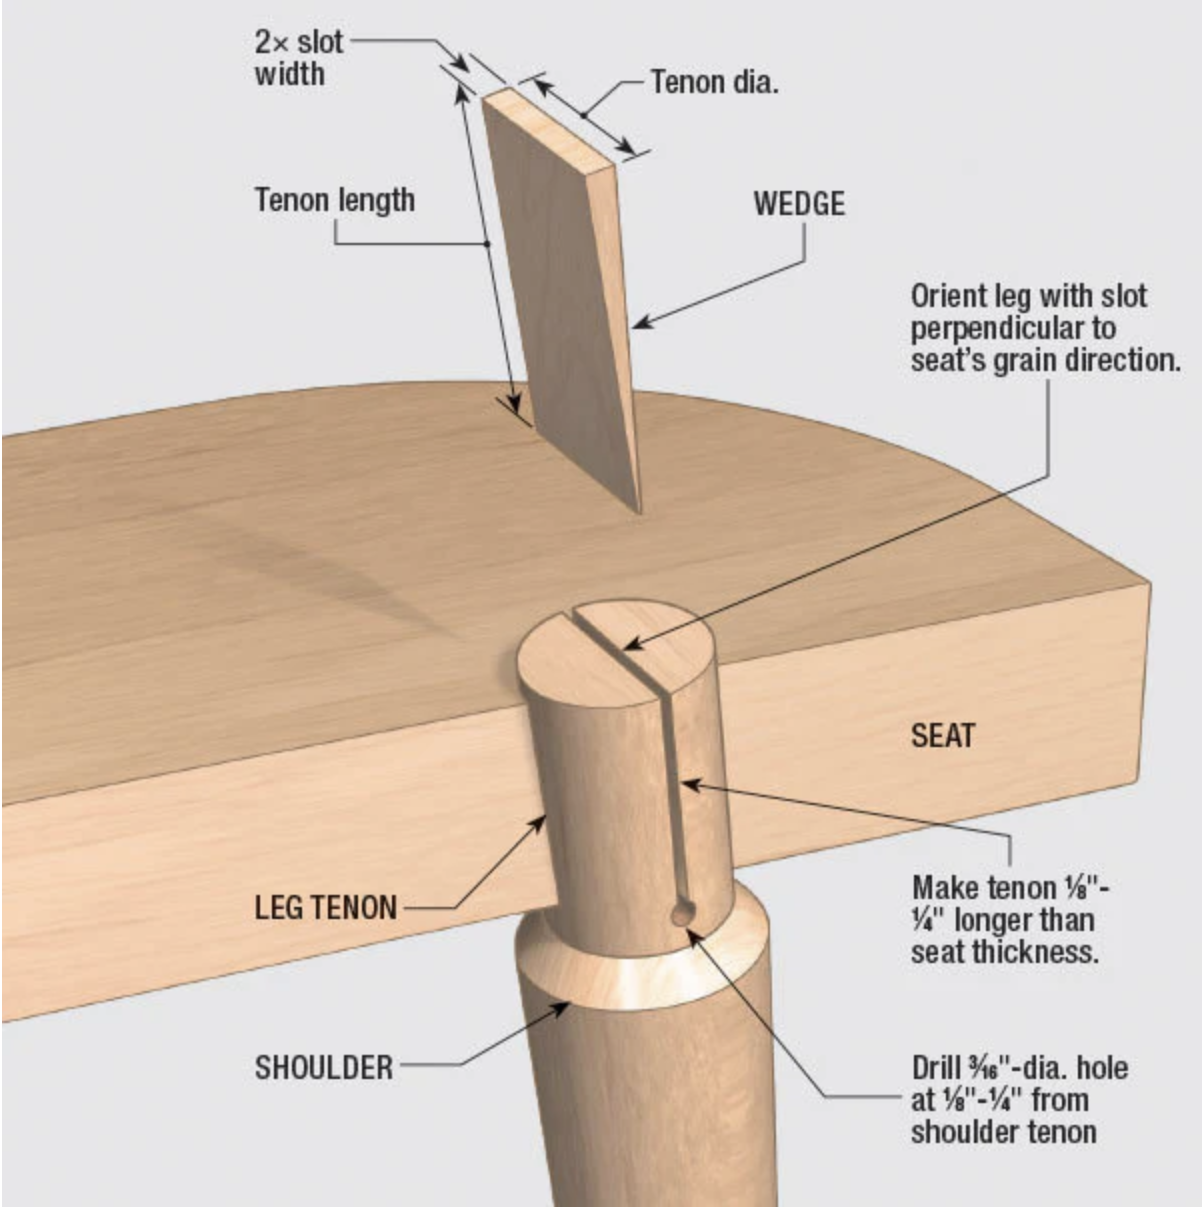
Here you can find tips, instructions, links and inspiration relating to the upcoming Woodworking for Women at Cabrillo College in Aptos, CA, July 27 - August 5. We’ll be building a 3-legged milking stool and carving spoons of course. I’m thrilled to teach this project this summer as it’s quite a bit more complex, involves wedged through tenons and a cool jig that turns a table saw into a lathe! Neat. Plus the milking stool will come together with no hardware. Nice.
Check back soon for pics and links. Meanwhile, I’ll just be adding random info here to help get myself ready.
Feel free to reach out if you have questions.
Sasha

Class structure:
SHOP ETIQUETTE Everyone deserves to feel safe and supported. If you ever feel unsafe, please let me or our TA know about it and we will do our best to either modify a process or suggest an alternative.
This is a shared space with shared tools and will require patience as we wait for tools to become available. Their may be up to 16 students waiting to use any number of tools. Everyone will get their chance to use a particular tool. If you are waiting, try to think of something you can do to fill up your time. Sanding, cleaning, carefully observing, and of course, spoon carving! Our spoon carving journey should keep us busy when we are queued up. Grab your knife and enjoy.
SAFETY ALWAYS COMES FIRST! TAKE YOUR TIME. THERE IS NO COMMAND Z IN WOOD WORKING.
Knife skills are life skills. Remember the #1 mission of spoon carving is DO NOT CUT YOURSELF.
In this 12 hour workshop, we begin with in introduction to spoon carving, which is a great way to learn about wood grain, and begin thinking about best safe practices in the wood shop. By hour 3 we will start building our milking stool, beginning with rough cutting and laminating the top, and cutting and milling the legs. Our goal is to cut out the top on the bandsaw by hour 5! By hour 8 we should have cut the slots for the wedges and shaped our cross braces and by hour 10 we will put our stools together without glue. While we wait for our turn at a given machine, work on your spoon carving and/or sand your stool top and legs.
IN ORDER TO PUT YOUR STOOL TOGETHER YOU NEED TO LABEL AND ORIENT THE PARTS CORRECTLY. MARKS IN PENCIL OR KNIFE MARKS SHOULD BE MADE ON THE UNDERSIDE OF YOUR STOOL SEAT AND CORRESPONDING LEGS. I’LL GO OVER THIS IS DETAIL. IT’S IMPORTANT NOT TO SAND AWAY YOUR MARKS!
Milking Stool Parts list:
One top 14” x 1 1/2” (rough cut at 14 1/2”)
3 legs 1 1/2” x 16 1/2”
2 cross braces
3 wedges 1 1/2” x 3”
Power Tool Inventory
Table saw
Miter saw
Band saw
Dimensional planer
Drill press
Power sander
Hand Tool Inventory
carving knife
Japanese pull saw
bench chisel
gouge chisel
hand plane
hook knife
Japanese rasp
draw knife
spokeshave
Order of operations:
Locate your lumber. You’ll receive enough lumber to make the stool, approximately 60 inches of what’s known as a 2 x 6. But it’s actually 5 1/4” by 1 1/2” thick.
Cross cut your lumber to 3 pieces at 14 1/2” and one piece at 16 1/2”. These 4 pieces will make up your top and legs.
TO BE CONTINUED